

How To Install Ssh Ubuntu Server
OpenSSH, abbreviated from OpenBSD Secure Shell, is a tool used to secure remote connectivity between the host and its client via SSH protocol. Since it uses the SSH protocol for network communication, it cares about connection hijacking and attacks, and it also encrypts the network traffic communication by using different authentication methods. This post will learn how to install the OpenSSH server on Ubuntu 20.04 and how to enable it for remote network communication.
Installation
By default, remote access is not allowed in Ubuntu 20.04 using the SSH, and we first have to enable the SSH. Just follow the step-by-step guide given below, and you will have the OpenSSH server installed and enabled on your ubuntu 20.04 LTS system for remote access.
Step 1: Open up your terminal and update the system's APT cache repository
First of all, fire up the terminal in your ubuntu system by using the shortcut keys (CTRL+ALT+T) and type the command given below to update the system's APT cache repository.
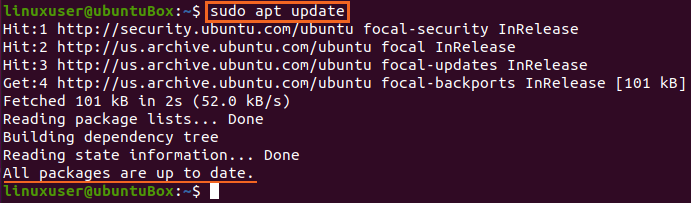
The system's APT cache repository is updated successfully.
Step 2: Install OpenSSH server
Right after updating your system's APT package repository, install the OpenSSH server on your Ubuntu machine by typing the command provided below.
$ sudo apt install openssh-server openssh-client
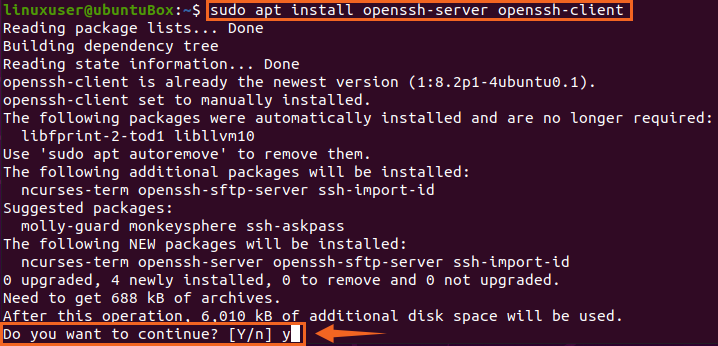
Type "Y" and hit "Enter" to grant permission for taking additional disk space for the OpenSSH server's installation.
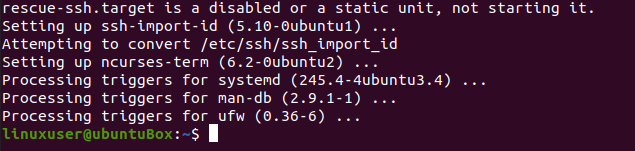
After taking some time, the OpenSSH server's installation process will be completed, and the SSH server will automatically start.
Step 3: Verify that the SSH service is running
To verify the status of the SSH server, type the command given below.
$ sudo systemctl status ssh
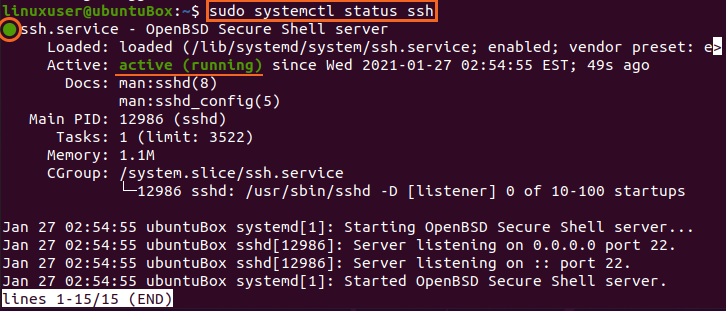
If you have got the output that SSH service status is active, you must be perfectly ready to move forward.
Type "q" to go back and configure the firewall.
Step 4: Configure the firewall
Now you need to configure the firewall of Ubuntu using the UFW tool provided by Ubuntu itself. To enable the firewall for any remote machine to access this Ubuntu machine, you need to open an SSH port. The command for configuring and allowing remote access is typed below.

After allowing SSH, it is time to enable the firewall as well. To check if it is enabled or not, the command for checking the status of UFW is given below
![]()
If it is inactive and the case is the same for you, then you need to enable it by typing the command
![]()
After enabling the UFW, check the status again
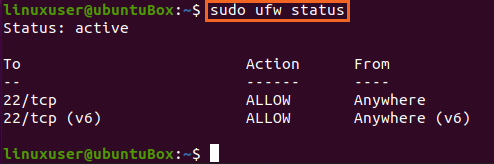
You can see that SSH port 22 is opened. If you have the same output as shown in the picture, then the system is ready for remote connections via SSH.
Conclusion
This post has shown you the step-by-step guide on how to install and enable the OpenSSH server on Ubuntu 20.04 for remote connections. After this configuration, you can log in to this machine from any remote machine via SSH.
About the author

A Javascript Developer & Linux enthusiast with 4 years of industrial experience and proven know-how to combine creative and usability viewpoints resulting in world-class web applications. I have experience working with Vue, React & Node.js & currently working on article writing and video creation.
How To Install Ssh Ubuntu Server
Source: https://linuxhint.com/how-to-install-and-enable-openssh-on-ubuntu/
Posted by: martinezclinking.blogspot.com
0 Response to "How To Install Ssh Ubuntu Server"
Post a Comment